Simple Homemade Wedding Cake Recipe
You’ll find the full recipe for a homemade DIY wedding cake, along with a video showing how to decorate it. This elegant and simply decorated vanilla wedding cake comes with two tiers and full assembly instructions. It is easy to make for anyone who follows the detailed instructions in this post.
Want to Save this Recipe?
Once you enter your email, you will receive the link in your inbox. Join the 250,000 bakers who receive my baking recipes every week.
I’m sharing this recipe for a 2-tier homemade wedding cake because many of you have requested it. This wedding dessert, adapted from my 6-inch and vanilla cake recipes, is not only gorgeous but also delicious.
You will be able to impress the wedding guests and happy couples alike with this unique dessert. This post is a must-read.
This DIY Wedding Cake is:
- Only the best ingredients are used to make this dish
- Home bakers can easily manage this recipe
- Rustic chic meets simplicity
- Complemented by a complete list of useful kitchen tools
- Ideal for a small, intimate wedding (approximately 30 to 35 people).
- If other desserts are available, this is a great option for larger weddings.
How To Make A DIY Homemade Wedding Cake
This is a two-tiered wedding cake. Both tiers are moist, buttery, and soft. This homemade wedding cake uses vanilla buttercream instead of fondant. Make each cake separately to avoid overloading your mixer and over- or under-mixing.
- Separately prepare each batch of frosting.
If you don’t have an extra oven or space in your oven, bake the cakes one by one. The cakes should be completely cooled before you assemble and decorate them. I will cover this in a separate section.
The same ingredients for both Tiers
Both cakes use the same ingredients, and each has a specific purpose. I don’t recommend substituting. Use sugar, cake flour, extra egg whites, and whole milk. Also, use butter at room temperature. You’ll also need a few additional ingredients. Use this cake flour alternative if required. Use leftover egg yolks in these recipes.
- As a filling, 2-3 batches of egg-yolk-based lemon curd would be wonderful between the layers.
I use my vanilla cake recipe for the bottom layer but substitute buttermilk with whole milk and soured cream. This is so that you won’t have to use any different ingredients for the two tiers. (Because of the top tier using whole milk and soured cream.) You could substitute buttermilk for both whole milk as well as sour cream in the 6-inch cake. However, buttermilk is not readily available.
Other Flavor Options
Vanilla is a popular flavour that will please many wedding guests. You can play around with the frostings, flavours, and fillings. Here are five other options for cake flavours:
- Carrot Cake: Use my carrot cake recipe for the bottom layer and make half a batch for the top layer. The same baking instructions for 6-inch cakes are described below.
- Red Velvet cake: To make the bottom layer, use the recipe for my red velvet cakes. As per the instructions in the recipe, divide your cake batter between three 9-inch pans. You can also use the red velvet cupcake batter to make the 6-inch6-inch cake. The same baking instructions for 6-inch cakes are described below.
- For the bottom layer, use my lemon cake recipe. For the 6-inch cake, use my lemon cupcake batter. The same baking instructions for 6-inch cakes are described below.
- Marble Cake: Use the zebra cake recipe for the bottom tier. For the top 6-inch cake, use my smaller zebra cake recipe (see 1st Birthday Cake).
- Mini Chocolate Chips: After adding milk to both cake batters, fold in 1 1/2 cups (270g) and 1 cup (182g) of mini chocolate chips into the 9-inch vanilla cake batter. Mini chocolate chips are more filling than regular-size chips.
These are the only flavours that I have tested. As of now, I do not have a chocolate version that is sturdy enough to be used as the bottom tier.
Do you want to mix flavours? Use the cupcake recipe from my post on 6-inch cakes for the top layer. According to the post, a cupcake batter that yields 12-15 mini cupcakes is perfect for a three-layer, 6-inch cake.
Filling Ideas: My cake has vanilla buttercream as the filling, but you can use any frosting flavour you like. Add extracts such as coconut, almond, orange or lemon to your frosting. Start with one teaspoon and taste. Add more according to your taste. You can also add a few Tablespoons of raspberry jam to the vanilla buttercream or raspberry cake filling.
The cake batter for the 6-inch cake (on the left) is creamy and light. The batter for the 9-inch cake (right above) has a thicker consistency because it is denser at the bottom (to provide extra support).
Prepare Wedding Cake Pans
Line your pans with parchment rounds before adding batter. Start by lightly spraying or greasing each bottom and side with nonstick spray. Grease the parchment paper and then add it. You don’t need to purchase special parchment paper rounds. Just trace the bottom of the cake pan onto regular parchment paper and then cut it into rounds. The parchment paper rounds ensure that the cakes will release easily from the pans once they have cooled.
My post, 10 Cake Baking Tips, contains all of my tips on how to bake the best cakes.
Other Cake Pan sizes
This recipe calls for a 9-inch 3-layer cake and a 6-inch 3-layer cake. The 9-inch pan requires 8-9 cups, and the 6-inch pan 4 cups. You can use my Cake Pan Sizes & Conversions to calculate the amount of batter needed for other sizes.
Wedding Cake Video (Decorating Tutorial)
Allow the video to load for a few moments below this text. The cake is a horizontally faded image. To play the video, click on the play button at the centre. Ad blockers should be temporarily disabled on your browser.
How To Assemble and Decorate A Homemade Wedding Cake
Assembling
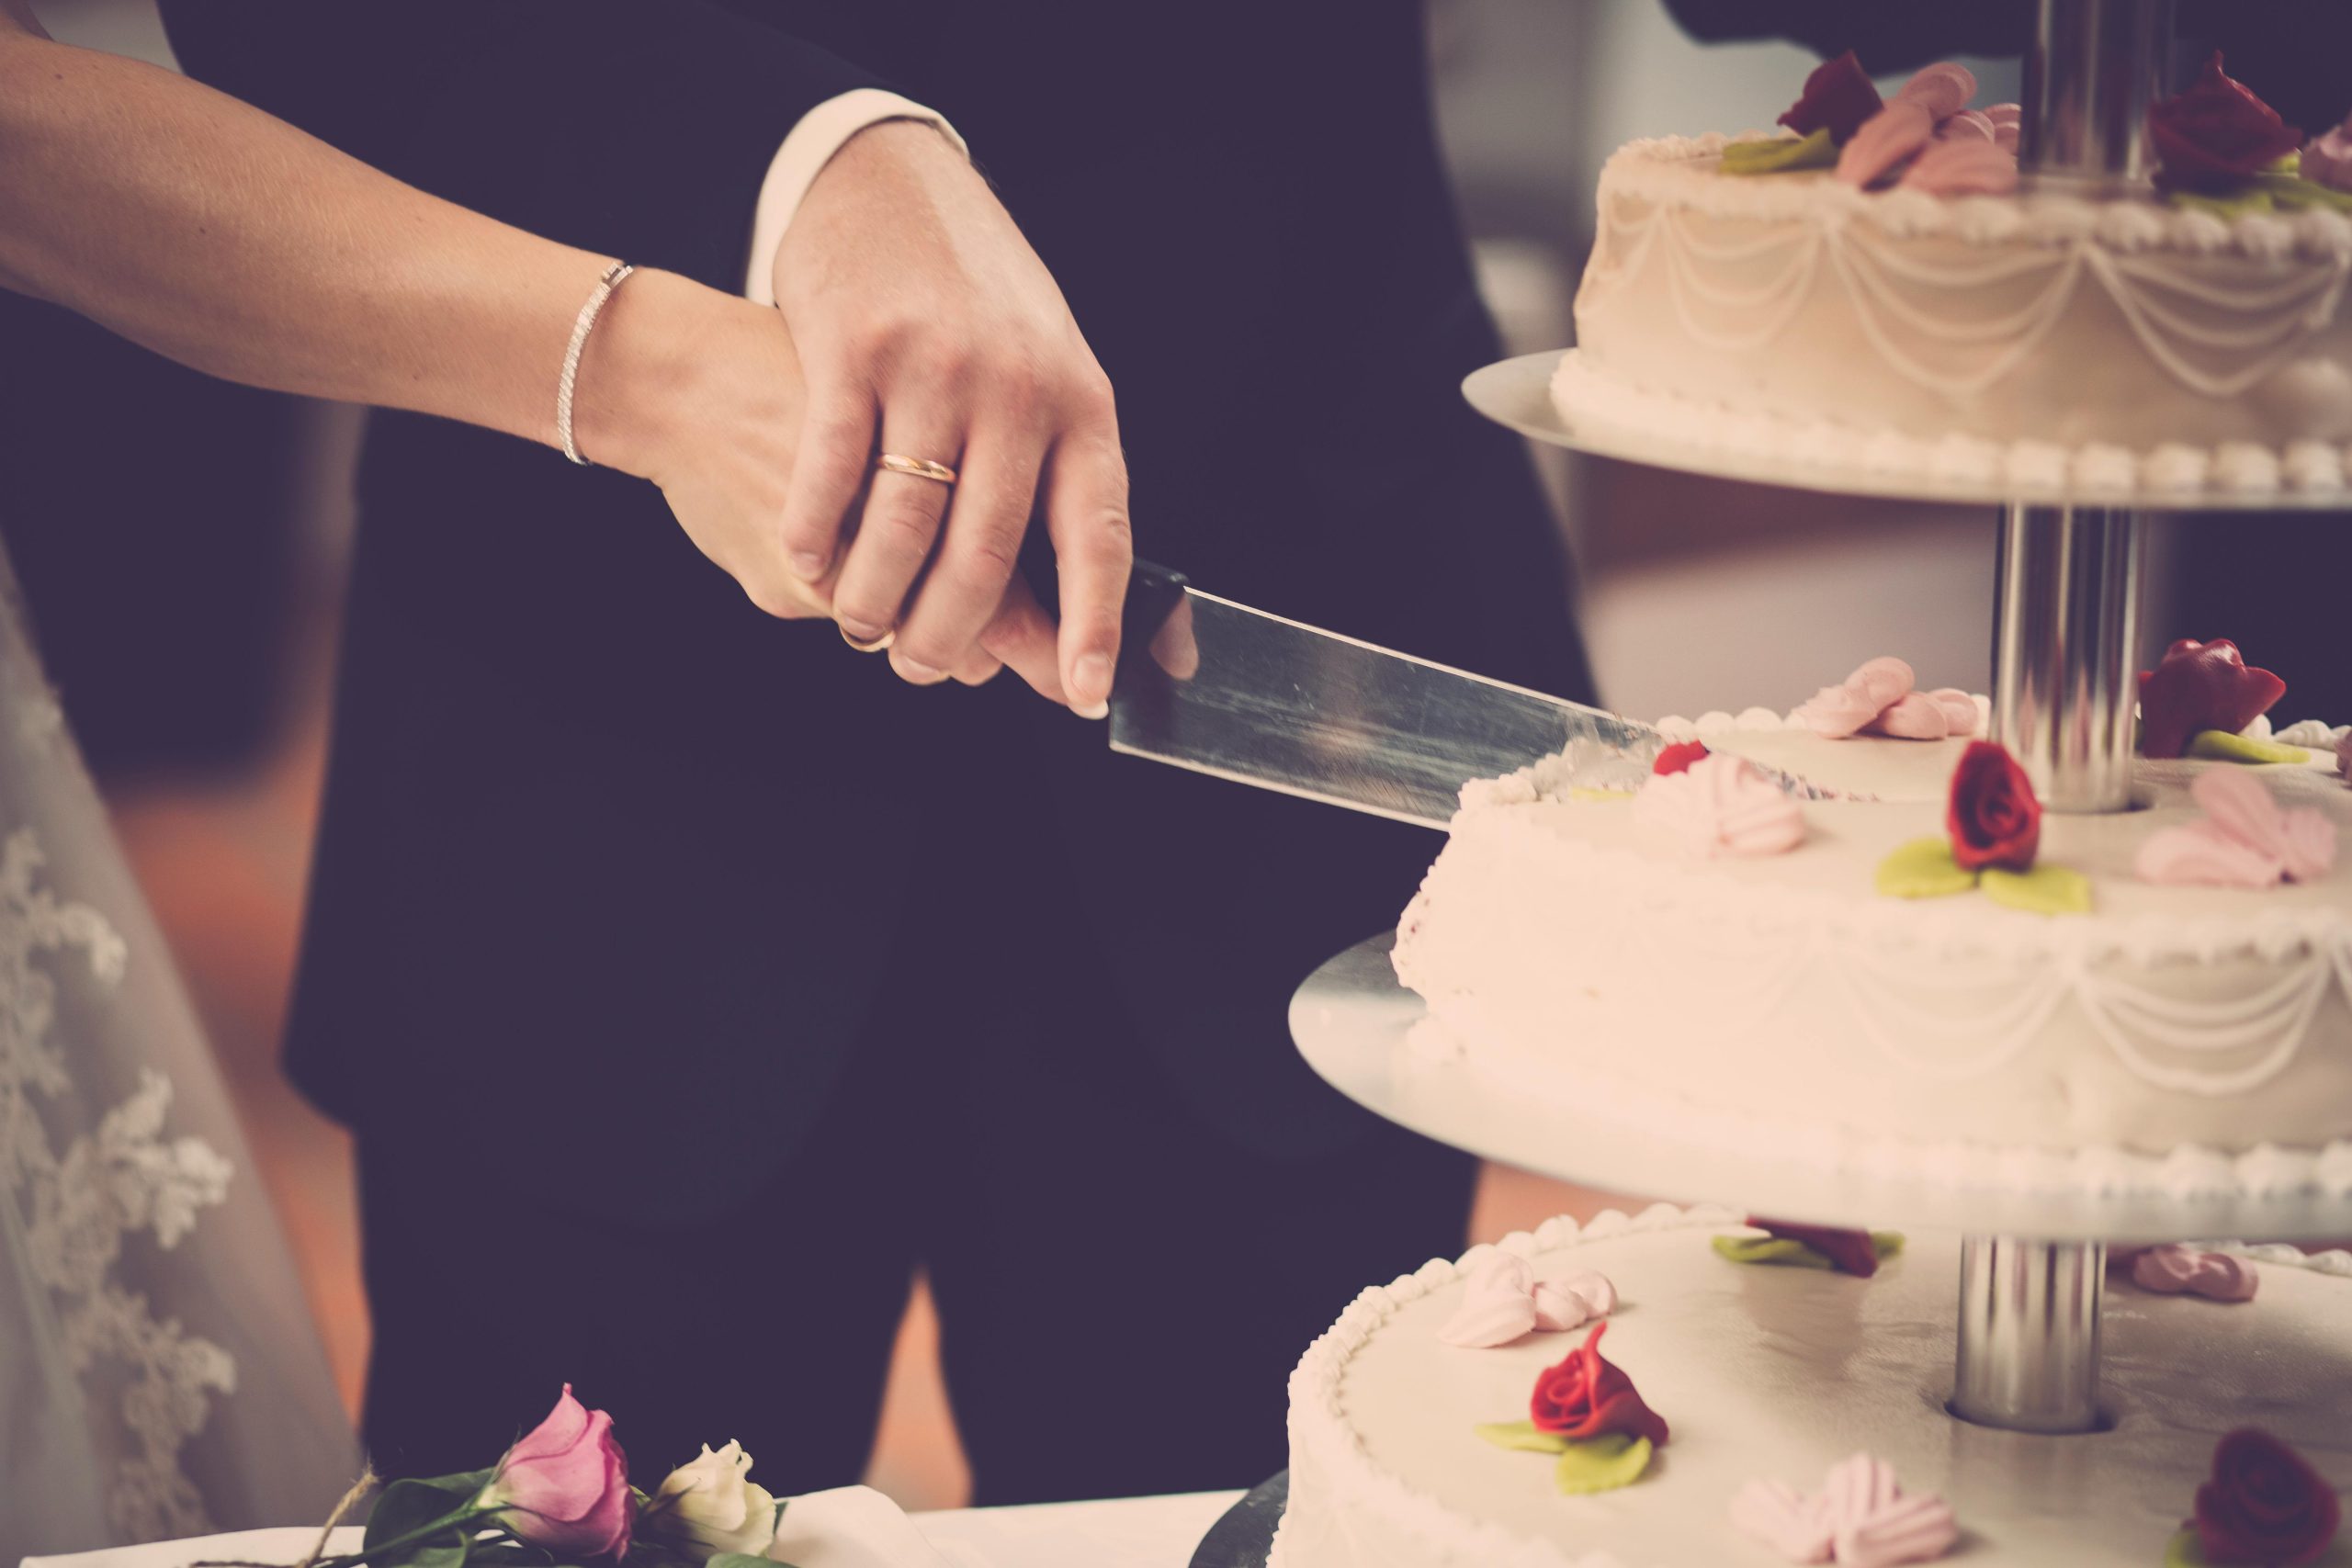
Place the two cakes on top of each other. Four cake dowels should be placed at the bottom of each tier to ensure stability and support. The top cake tier will be supported by cake dowels, which need to be cut and measured so that they are flush against the surface of the cake. Then, place the smaller tier. The 6-inch cake board that I will describe in the next section is essential between the tiers to provide additional support.
As shown in the video, decorate and crumb coat both cakes separately. Next, we’ll give you the decorating instructions.
Decoration
Decorate the top and bottom tiers of your cake on cake boards. If desired, you can remove the cake board from the bottom layer before placing the cake on a cake stand or serving platter. This can be tricky! Normally, I leave it. It can be hidden by piping a border of frosting around the bottom edge of the cake. The cake board should not be removed from the bottom tier. The cake board is placed between the two tiers to provide additional support and stability. It also ensures the cake won’t fall when you cut the top tier.
It’s the cake of a lifetime. So it should not only taste good but also look amazing. Stick to simple decorations if you want to reduce the chance of mistakes or flaws. To prevent crumbs from getting on the frosting, you need to apply a crumb coat over both layers.
- What’s a crumb coating? A crumb coat is a thin frosting layer around the cake before the exterior frosting is applied. The video, pictures, and recipe show how I crumb-coated the cakes. Refrigerate the cakes to “set” this crumb coat.
The video above shows that a bench scraper is useful for applying the crumb coating and exterior frosting layer. I use the bench scraper to decorate all layers of cakes. For the tops of the cakes, I like to use an icing spatula. I use a smaller icing spoon for the small cakes and a larger icing spoon for the large cakes.
After the crumb coating, the cakes must be chilled to “set” the coating. Cake boards are also necessary to help transport the cakes.
It is easy to create the textured exterior frosting, which my assistant Stephanie suggested. Use a small icing spoon to run around the cakes, as shown in the video. This look is easy to achieve and resembles beautiful ruffles.
Piping
You can then pipe frosting all around the bottom after placing the top tier. This will cover up any smears or spaces that appear while arranging the top layer. With a round tip, I piped dots of frosting between the tiers and around the bottom of the cake. These look like pretty pearls. If you want to smooth out any peaks, moisten the tip of your finger with water and gently push down on them.
More Inspiration
- Flowers and Berries on a naked cake
- Buttercream Flowers
- Frosting Roses in Two-Tone
Use my vanilla buttercream (in an increased quantity, of course) to decorate. Two separate batches are needed, one for each layer. It’s impossible to make enough frosting in one batch, and your mixer will be overwhelmed.
The total frosting is 8-9 cups, which includes the frosting, crumb coating, exterior ruffled icing and piping. Find a recipe for other flavours and adjust it to make 8-9 cups.
How To Keep Air Bubbles out of Buttercream
Overwhipping vanilla buttercream creates air bubbles. Buttercream that is not smooth and velvety no longer tastes good but is still delicious.
This is how you can get rid of bubbles in frosting: Forget the mixer. Start stirring buttercream with a wooden spoon or metal spoon. To “pop” bubbles, mash the frosting against the side bowl. Do this for 1-2 minutes or until the majority of air bubbles have popped. This trick is very difficult to do!
Recommended Special Tool
- Mixer (Handheld Mixer or Stand Mixer).
- Egg Separator
- 3 9x2 Inch Round Cake Pans
- Three 6×2 inch round cake pans
- Cake boards (I use one 6-inch and one 10-inch). A 9-inch board can be used for the bottom cake. Purchase this set, which includes cake dowels.
- Cake Dowels (You will need 4): Plastic cake dowels can also be used, as they are more easily cut.
- Large Icing Spatula (for large cake)
- Spatula for small cakes and ruffled edges
- Bench Scraper
- Cake Turner
- Piping Bags (disposable and reusable).
- Round Piping Tip
- Artificial Flower Decor. I used the colour “Cozy Blush”. These are amazing!
- Large serving plate or cake stand (See a wooden stand that I bought at Target last season). Some of my favourite cake stands are on my list of Gift Ideas For Bakers.