Everything I Learned Making a Wedding Cake from Scratch
There are so many things to celebrate on one day: the dress, the kisses, the dancing and the cake. Before Pinterest and DIY weddings became a thing, I got married 10 years ago as I started my career in the food industry. I never thought about making my cake for my wedding.
I instead ordered a beautifully nice (albeit forgettable) tiered cake from a baker. Fast-forward 10 years, and weddings have become more relaxed and non-formulaic. When my sister casually offered to bake the wedding cake for our friends Alex and Tyler, I was both flattered and terrified. After a while, I asked myself, Why not? Having baked many cakes and made bowls of buttercream before, I was confident that I could handle the rest. The rest would take a lot of preparation and practice.
Some bakers have such confidence in their abilities that they just wing it (and the result is beautiful!). Here’s the truth: I am not a baker like that. I am a planner and a perfectionist to the core. I went overboard in my preparation and practice for this cake. (I was probably more excited for the wedding than the bride.) I tweaked recipes, stored egg whites, and prepared for the wedding day so I wouldn’t throw my apron away in a cloud of flour and frustration.
It was a great success, and I am happy to report that! The cake was beautiful, Alex and Tyler had a perfect wedding, and I’ve learned so much along the way. If you are thinking of doing the same, here’s my advice.
1. Research what professional wedding cake bakers are doing.
The size and requirements of a wedding cake are quite different from those of a party cake. I began by observing how professional bakers start their process.
It’s easy to start by copying the cake order forms from any bakery, whether a chain supermarket or a small boutique. Then, I added a section for the wedding details, including where to drop off the cake and when. I left room for cake details.
The wedding cake is much smaller than the cake you would serve for a birthday. I used Wilton’s cake-cutting guide to help Alex and Tyler decide how big a cake to order, keeping in mind that many guests will not leave the dancefloor to grab a piece.
I brought Tessa Huff’s book Layered to the meeting to discuss flavours and show them different finishings (none included fondant or intricate piping—techniques that are just not in my skill set). We then filled in all the details, from the number of layers to the shape of each cake, finishing with the flavors and fillings.
2. Estimate your costs accurately.
Bake a wedding cake to give as a gift to the couple or even for yourself. If you want to charge for your work, you need to know what to ask.
Contact local bakeries and ask about the cost per slice and if there are any delivery fees or other charges. I created a list with all the equipment I would need to bake and deliver the cake. I also included the cost of purchasing any items I did not already have. I listed everything from cake pans and parchment paper to cake boxes, piping bags, and cake boxes.
Finally, I estimated how many hours I would spend testing recipes, baking, decorating, travelling, and setting the cake up. Remember: it might not be cheaper for the couple to select you over a bakery that orders in bulk, has space and equipment, and already has all the ingredients.
3. Buy supplies early.
You don’t want to be ordering cake pans, boxes or piping bags the week before your wedding. I bought my supplies in advance and kept them all together for easy access.
The equipment I used included my stand mixer, large mixing bowls, and two pans of different sizes. (You can also buy pre-cut parchment rounds.) I also had to purchase pastry bags, gel colour, piping tips, and mini—and full-size offset and straight spatulas.
4. Prepare the cakes in advance!
As I approached my wedding, every time friends or neighbours saw me, I always had a cake with me. In the past year, I baked cakes for a wedding shower, three birthdays, and two baby showers just to get used to layering. I made the same flavours of wedding cakes for every occasion to improve the recipes and adjust the existing recipes to the pan size.
5. When traditionally making a white cake, you can freeze your egg yolks.
The egg whites freeze well, so I kept them in the freezer for the entire year before the wedding whenever I made a recipe that only called for a yolk. For the Swiss meringue, I measured egg whites by weight, so it was not necessary to freeze them separately. When I had extra egg whites, I put them in a food container that was stored in the freezer.
6. Prepare as much as you can in advance.
After finalizing the cake recipe, I divided the dry ingredients into two separate containers. They were clearly labelled with the ingredients, flavour and tier. (I told you that I am a perfectionist and planner!) You can make cake layers a few months in advance, as long as you let them cool completely and then wrap them in foil or plastic wrap before freezing. The cakes should be thawed in the refrigerator a day prior to icing so that they can slowly defrost.
7. Learn how to decorate with icing.
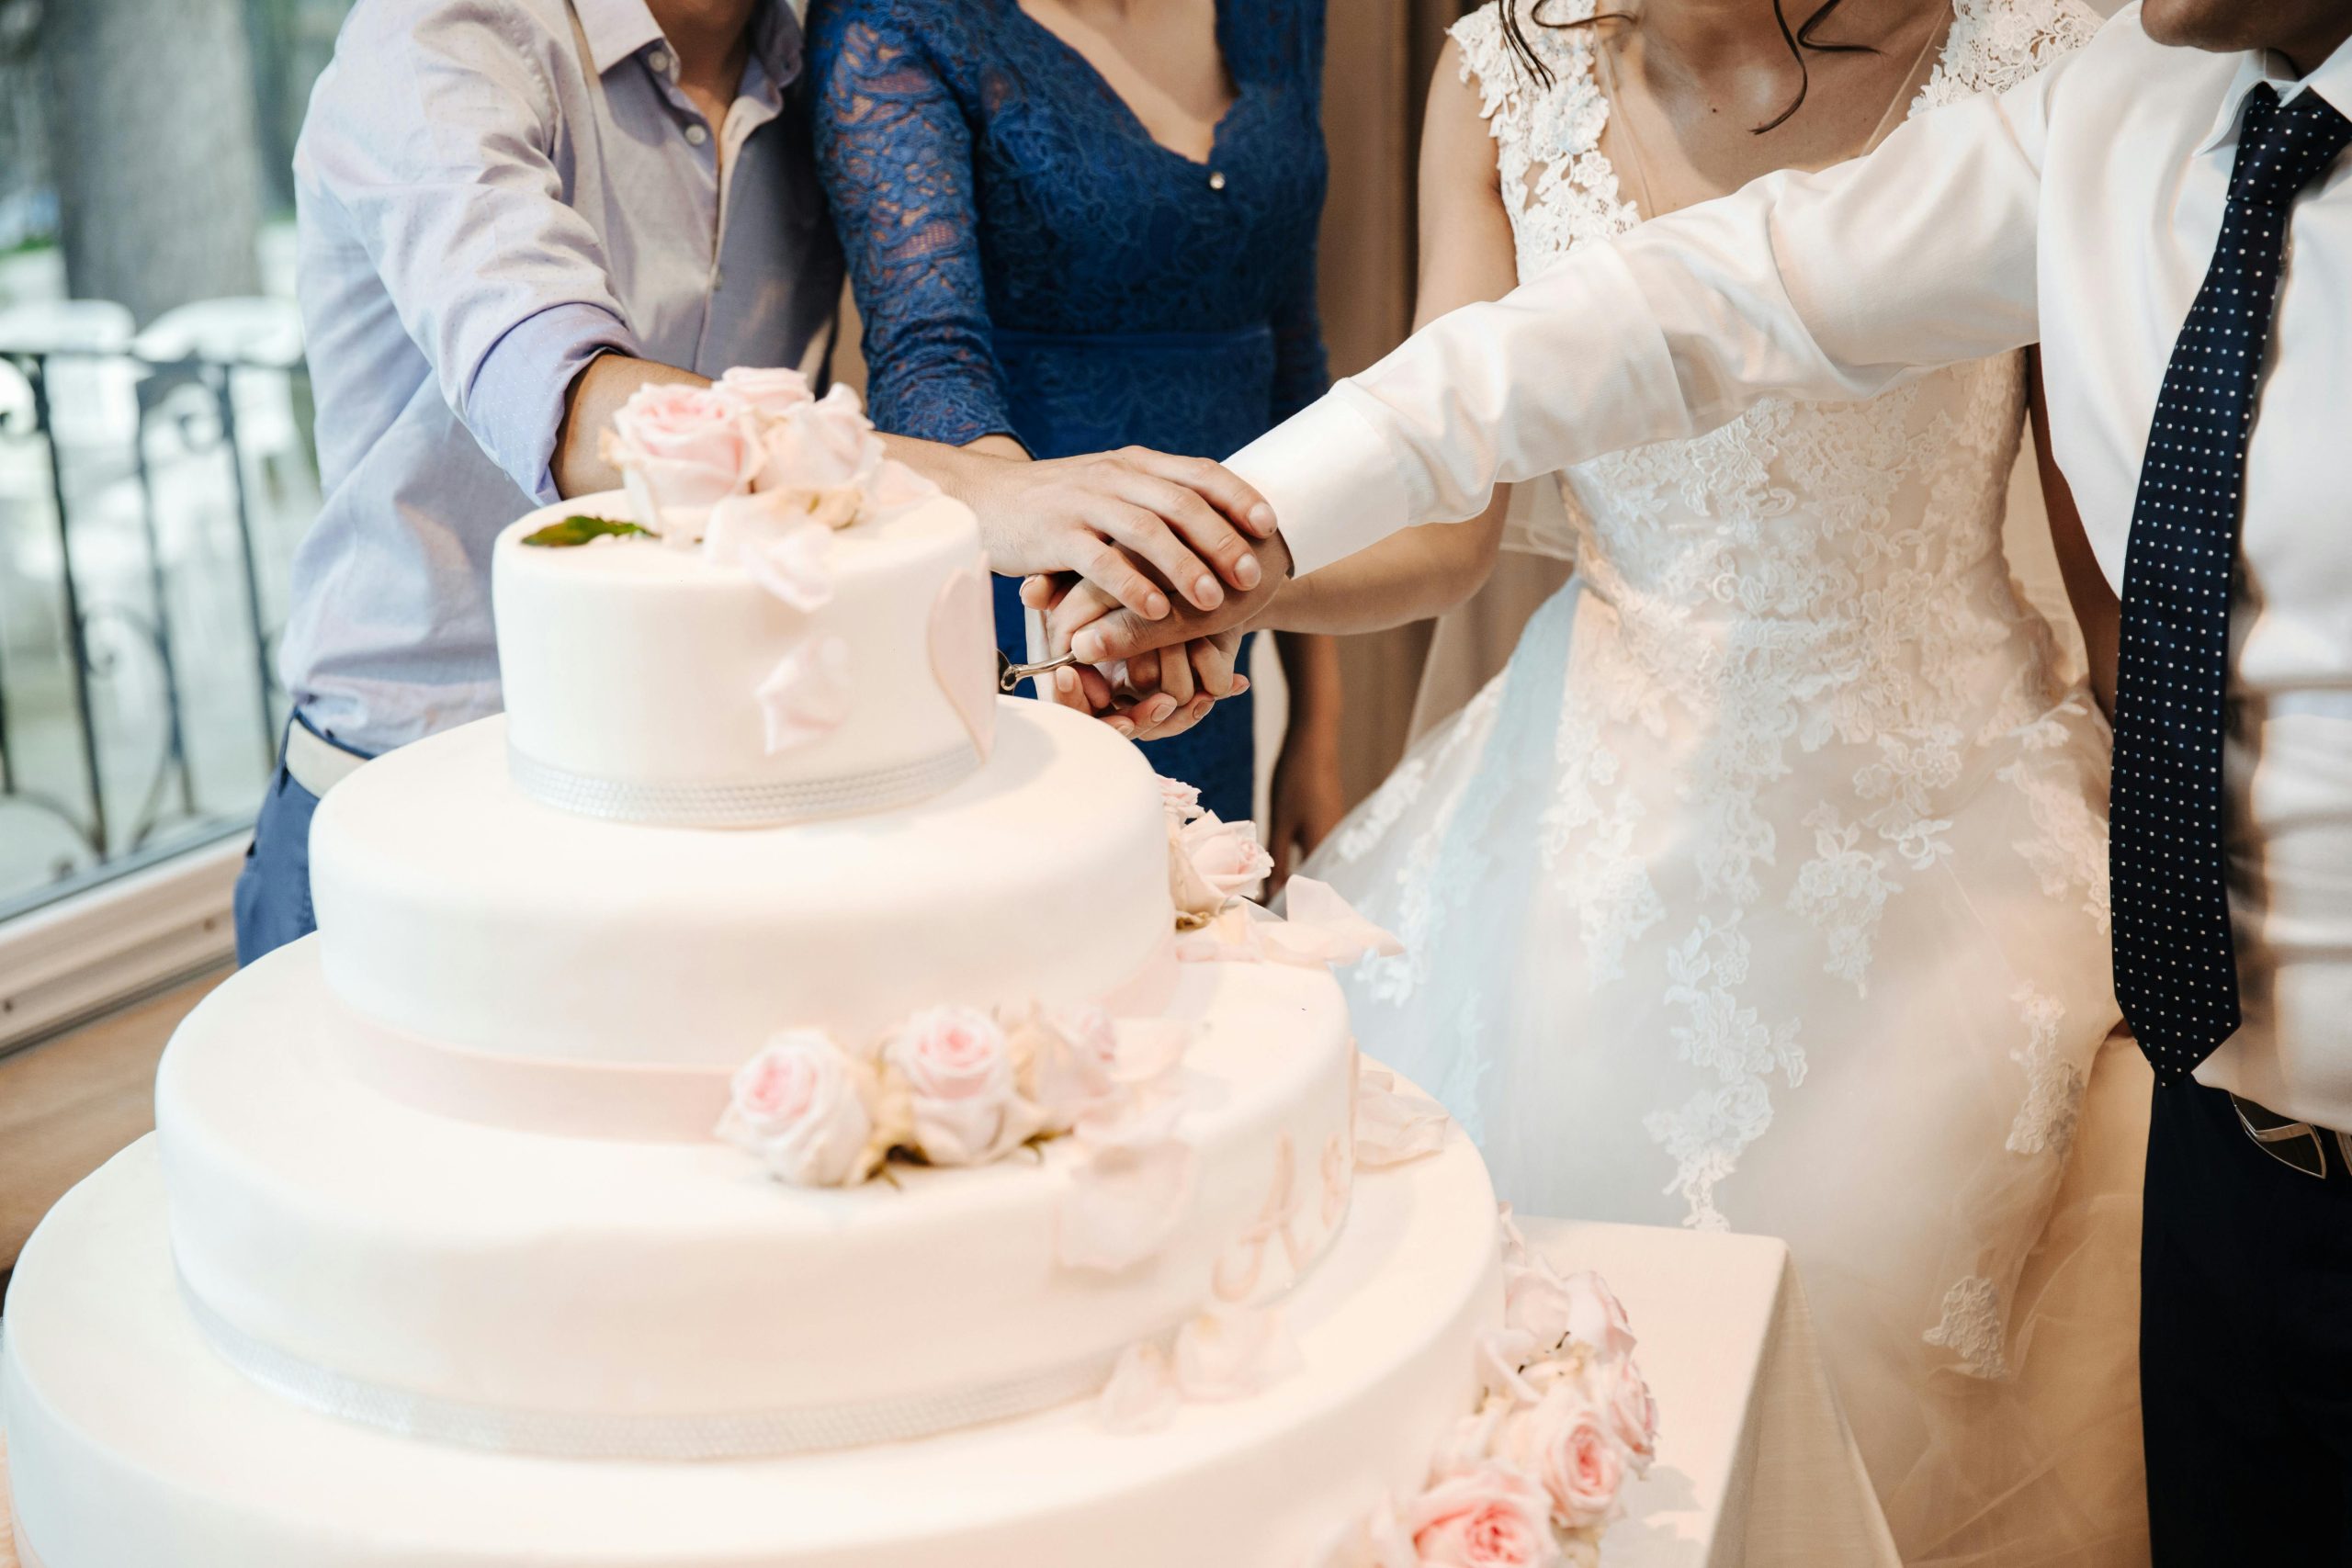
Alex and Tyler requested that their cake be covered in buttercream with a swirled finish, coloured to match the sunset. (See below!) Although I didn’t have to practice intricate icing patterns or lace piping, I did practice swirl texture and blending colours on the cakes that I baked over the year.
Cake supply shops and some craft stores sell Styrofoam rounds for practising piping, but I already had enough real cake to practice with.
8. It’s not scary to make a cake. Just take it slow.
Each three-layer layer is constructed on cardboard rounds. My local cake supply shop advised me to use the next larger size for each cake. It will be easier to move the cake in and out of your fridge as you frost and fill it. Trim the excess using kitchen shears before building. Once the cake has been assembled, any raw edges can be hidden with simple piping or ribbons.
The top tiers of layer cakes can rest on wooden dowels rather than the delicate cake. I used a thin, small hacksaw to cut the dowels into size. I left a flat edge, which I sanded before inserting them into the cake. After the dowels have been placed, a round of parchment is added to prevent the buttercream from sticking. After that, the cake rounds will be carefully (but confidently!) The cake rounds are then carefully (but confidently!) stacked on top of each other.
9. Don’t deliver solo.
You can bring someone along to help you with the delivery of the cake. They can drive the box while you watch over it on the road. This friend can be an extra set of eyes that will let you know whether the cake is in the right place before you put the next layer on. This friend’s main job is to give a high-five and toast with Champagne for a job well done.